StickBackup likes drive names. So give your stick a unique name. On Windows, go to "My Computer", right click on the icon for the stick device and choose "rename".
Why giving Sticks a name? The sad fact on windows is that the system uses letters for drives. More than that, drive letters can change every time you'll plug in the memory stick if you plug in another removable storage device. That's the reason why StickBackup can search for the drive name instead of the drive letter. However, this is an option you can set (see Step 4).
If you don't have a JRE 5 as minimum installed on your system, download and install the latest java JRE from http://www.java.com. If you don't know, try it. On Windows, StickBackup will tell you if you've already installed a JRE or not.
Download the latest distribution of StickBackup from http://stickbackup.sourceforge.net (.exe for windows users, .jar for all others).
(The memory stick must be plugged in for this, of course) StickBackup starts up on the center of the screen and gives you a welcome:

If you've started Stick Backup the first time, you should configure it first. Click on the button labeled with "Configuration". A new dialog pops up:

Source Directory: this is the directory on your memory stick. You can choose it by clicking the button labeled with "..." on the same line. If you're a Microsoft Windows user and if you like to search for the drive name instead of the drive letter, you should ckeck the option "Check windows drive name" on the right side of the line. However, this is only useful if the destination is a removable drive and has a unique name (see Step 1).\ Destination Directory: This is the directory where your backup goes to. StickBackup will create a directory called "backup" and (after the first backup) a directory called "archive" in this directory. I recommend you to create a fresh directory to put the stick backup files there. If you're a Microsoft Windows user and if you like to search for the drive name instead of the drive letter, you should ckeck the option "Check windows drive name" on the right side of the line. However, this is only useful if the destination is a removable drive and has a unique name (see Step 1).
Just as a note, the beloved Ubuntu Linux uses the stick name to make a directory for the mount point in the system. So the "Check windows drive name" option is only choosable in Windows. Linux doesn't need that because it's completely directory based.
If you're happy with your configuration, click the button labeled with "Save".
Now you're ready to go for the first backup!
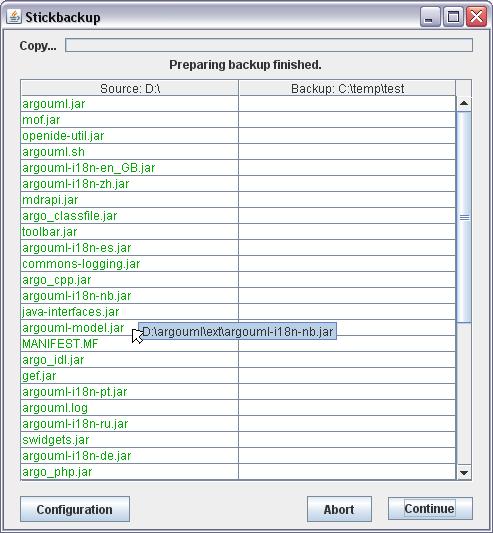
Click the button labeled with "Continue". StickBackup searches now all new, changed or deleted files of your stick. Since it's the first time you're running StickBackup, all files will be shown as new:

Click the button "Continue" again, and you'll see how StickBackup works on the files: if a file turns red, StickBackup does work on this file. If it turns light grey, StickBackup finished his work on this file.
That's all. You've made your first backup.